
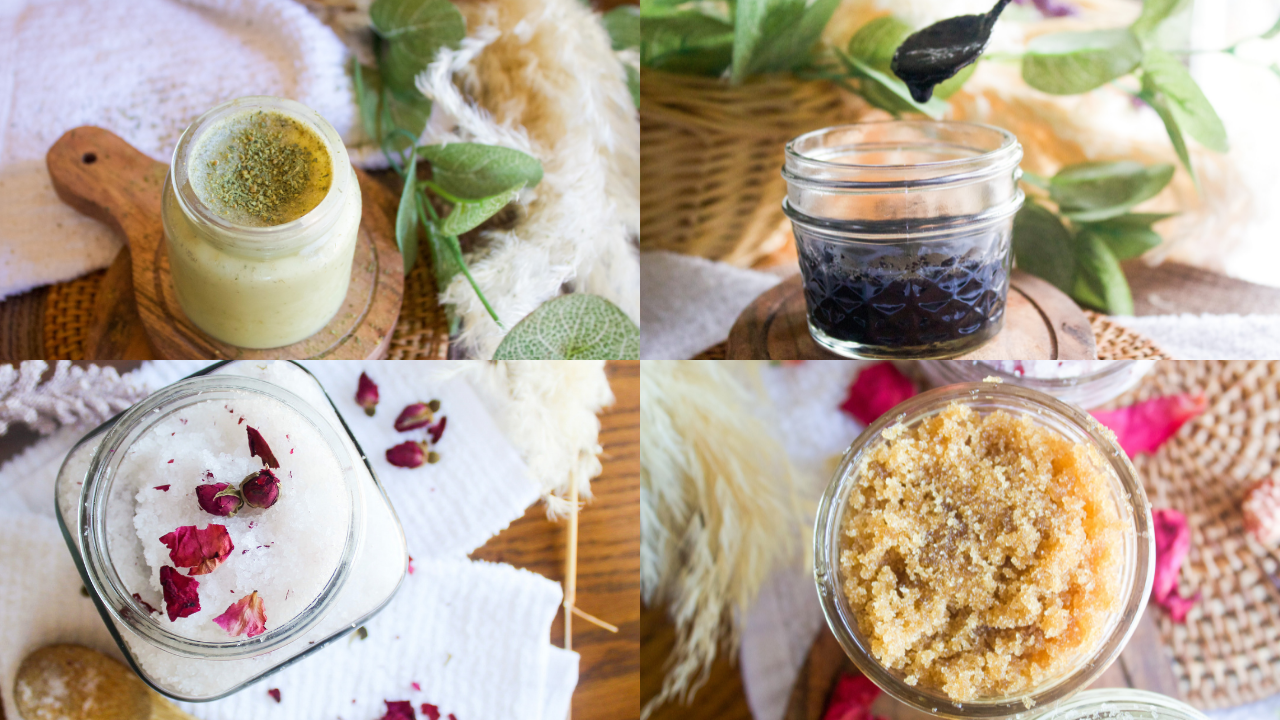
Self-care is usually something we all need, but don’t get enough of. As a mother of many, self-care is a rare activity I get to do. However, when I do get the occasional opportunity to indulge in some alone time, any one of these 10 DIY self-care products is my go-to. From a relaxing bath to taking a shower with my homemade shampoo bar and one of the sugar scrub recipes, self-care is never boring, that’s for sure!

In This Article:
Self-Care: Bath Time
- Lavender Rose Bath Soak Recipe
- Herbal Bath Bombs
Self-Care: Shower Products
- Brown Sugar + Vanilla Body Scrub
- Green Tea Soap Bar Recipe
- Homemade Shampoo Bar
- Coconut Milk Conditioner
Self-Care: Skincare
- Face Toner for Glowing Skin
- Anti-Aging Eye Cream
- Charcoal Face Mask
Self-Care: Bath Time
Lavender Rose Bath Soak Recipe

Equipment
- Mixing Bowl
- Measuring Cups
- Spoon
Materials
- 2 ½ Cups Epsom Salt
- ¼ Cup Sweet Almond Oil
- 1 Tablespoon Dried Rose Buds (see notes for substitution)
- 1 Tablespoon Dried Rose Petals
- 10 Drops Lavender Essential Oil
- 5 Drops Rose Essential Oil (Optional, see notes)
Instructions
- Add the Epsom salt to a clean bowl
- Add the sweet almond oil + essential oils
- Mix the Epsom salt and oils until the Epsom salt has been covered in oil
- Grind the dried flowers in a mortar and pestle until they become fine, you do not want any chunks.
- If using dried flowers, add those in and mix.
Notes
- If you do not want dried roses in your bath you could simply take those out of the recipe and substitute another 5 drops of rose essential oil.
Lavender Rose Bath Salt Recipe
Equipment
- Mixing Bowl
- Measuring Cups
- Spoon
Materials
- 2 ½ Cups Epsom Salt
- ¼ Cup Sweet Almond Oil
- 1 Tablespoon Dried Rose Buds (see notes for substitution)
- 1 Tablespoon Dried Rose Petals
- 10 Drops Lavender Essential Oil
- 5 Drops Rose Essential Oil (Optional, see notes)
Instructions
- Add the Epsom salt to a clean bowl
- Add the sweet almond oil + essential oils
- Mix the Epsom salt and oils until the Epsom salt has been covered in oil
- Grind the dried flowers in a mortar and pestle until they become fine, you do not want any chunks.
- If using dried flowers, add those in and mix.
Notes
- If you do not want dried roses in your bath you could simply take those out of the recipe and substitute another 5 drops of rose essential oil.
Herbal Bath Bombs

Ingredients
- 1 Cup Baking Soda
- ½ Cup Citric Acid
- ½ Cup Epsom Salt
- ½ Cup Cornstarch
- 2 Tablespoons Almond Oil
- 2 Tablespoons Water
- 10-15 Drops Essential Oils I used Lavender and Clary Sage
- 1 Tablespoon Dried Herbs
Instructions
- Add the dry ingredients (Baking Soda, Cornstarch, Epsom Salt, Citric Acid, and Dried Herbs) to a large mixing bowl.
- Next, add the wet ingredients (Almond Oil, Essential Oils, Water).
- Mix until you can squeeze the mixture in your hand without it crumbling, similar to the texture of sand.
- Once the mixture has reached the right texture, pack it into the molds. I used silicone cupcake liners because it is what I already have on hand. If you want to use real bath bomb molds to make a sphere, check these out
- Pack the mixture tightly into the mold, being sure not to overfill the molds as the mixture will get larger as it sits.
- Let the herbal bath bombs sit out at room temperature for at least 12 hours. The bath bombs should be completely dry once they have been set.
- When the herbal bath bombs are dry, take them out of the molds and store them in a container. Use as often as you please!
Notes
Herbal Bath Bombs
Ingredients
- 1 Cup Baking Soda
- ½ Cup Citric Acid
- ½ Cup Epsom Salt
- ½ Cup Cornstarch
- 2 Tablespoons Almond Oil
- 2 Tablespoons Water
- 10-15 Drops Essential Oils I used Lavender and Clary Sage
- 1 Tablespoon Dried Herbs
Instructions
- Add the dry ingredients (Baking Soda, Cornstarch, Epsom Salt, Citric Acid, and Dried Herbs) to a large mixing bowl.
- Next, add the wet ingredients (Almond Oil, Essential Oils, Water).
- Mix until you can squeeze the mixture in your hand without it crumbling, similar to the texture of sand.
- Once the mixture has reached the right texture, pack it into the molds. I used silicone cupcake liners because it is what I already have on hand. If you want to use real bath bomb molds to make a sphere, check these out
- Pack the mixture tightly into the mold, being sure not to overfill the molds as the mixture will get larger as it sits.
- Let the herbal bath bombs sit out at room temperature for at least 12 hours. The bath bombs should be completely dry once they have been set.
- When the herbal bath bombs are dry, take them out of the molds and store them in a container. Use as often as you please!
Self-Care: Shower Products
Brown Sugar + Vanilla Body Scrub

What You Need:
- 1/2 Cup Brown Sugar
- 1/4 Cup Almond Oil
- 5 Drops of Vanilla Essential Oil
Instructions:
Add all of the ingredients to a bowl.
Mix until sugar and oil are completely combined.
Rose Sugar Scrub
Ingredients
- ½ Cup Sugar
- ¼ Cup Almond Oil
- 3 Drops Clary Sage Essential Oil
- 2 Drops Rose Essential Oil
Instructions
- Add all of the ingredients to a bowl.
- Mix until sugar and oil are completely combined.
Rose Sugar Scrub

Ingredients
- ½ Cup Sugar
- ¼ Cup Almond Oil
- 3 Drops Clary Sage Essential Oil
- 2 Drops Rose Essential Oil
Instructions
- Add all of the ingredients to a bowl.
- Mix until sugar and oil are completely combined.
Rose Sugar Scrub
Ingredients
- ½ Cup Sugar
- ¼ Cup Almond Oil
- 3 Drops Clary Sage Essential Oil
- 2 Drops Rose Essential Oil
Instructions
- Add all of the ingredients to a bowl.
- Mix until sugar and oil are completely combined.
Green Tea Soap Bar Recipe

Equipment
Materials
- 1 pound Shea Butter Melt + Pour Soap Base
- ¼ Tsp Vitamin E Oil
- 2 Packets Green Tea Packets
- 10 Drops Soft Skin Essential Oil Blend
- Dye (Optional)
Instructions
- Set up a double boiler by boiling 1 cup of water in a pot with a glass, heat-safe, bowl on top.
- Cut melt + pour soap base into approximately 1-inch cubes.
- Add soap base into the glass bowl and begin to stir until soap has melted.
- Once melted, turn off the heat, and add the remaining ingredients (vitamin E oil, green tea packet, dye, and essential oil). Mix in thoroughly.
- Immediately pour soap mix into molds. I use these simple silicone soap bar molds.
- Allow sitting for 4 hours until the bar has completely set.
Notes
- This green tea soap bar recipe can be used on the face or body. When choosing an essential oil it is best to consider which purpose the soap bar will be used for. For example, using the Anti Age essential oil blend for a body soap bar would be fine, but the benefits of the essential oil would be better reaped if used in a face soap bar.
- If you do not use a dye in the soap, it will turn brown when it is dry. There is nothing wrong with the soap, it is a normal process.
Green Tea Soap Bar Recipe
Equipment
- 1 Silicone Soap Bar Molds
Materials
- 1 pound Shea Butter Melt + Pour Soap Base
- ¼ Tsp Vitamin E Oil
- 2 Packets Green Tea Packets
- 10 Drops Soft Skin Essential Oil Blend
- Dye Optional
Instructions
- Set up a double boiler by boiling 1 cup of water in a pot with a glass, heat-safe, bowl on top.
- Cut melt + pour soap base into approximately 1-inch cubes.
- Add soap base into the glass bowl and begin to stir until soap has melted.
- Once melted, turn off the heat, and add the remaining ingredients (vitamin E oil, green tea packet, dye, and essential oil). Mix in thoroughly.
- Immediately pour soap mix into molds. I use these simple silicone soap bar molds.
- Allow sitting for 4 hours until the bar has completely set.
Notes
- This green tea soap bar recipe can be used on the face or body. When choosing an essential oil it is best to consider which purpose the soap bar will be used for. For example, using the Anti Age essential oil blend for a body soap bar would be fine, but the benefits of the essential oil would be better reaped if used in a face soap bar.
- If you do not use a dye in the soap, it will turn brown when it is dry. There is nothing wrong with the soap, it is a normal process.
Homemade Shampoo Bar

Equipment
- Pot
- Glass Bowl
- Wooden Spoon or Rubber Spatula
- Silicone Molds
Materials
- 1 Cup Beeswax
- ¼ Cup Shea Butter
- 1 Tsp Vitamin E Oil
- ⅓ Cup Unscented Liquid Castile Soap
- 15 Drops Lavender Essential Oil
Instructions
- Start by creating a double boiler, this is a pot of water boiling on the stove (not too much water, I use about 2 cups), with a glass bowl set on top of the pot.
- Add your beeswax and shea butter to the glass bowl, using a wooden spoon or rubber spatula, mix every few minutes to ensure these ingredients are melting.
- Once the beeswax and shea butter are completely melted, turn off the heat.
- Add the vitamin E oil, unscented liquid Castile soap, and essential oils while the glass bowl is still on top of the pot with the stove turned off. The Castile soap will instantly turn into a solid, just stir it vigorously until it melts and mixes in with the other ingredients.
- Working quickly, take a small measuring cup and pour the mixture into your molds. I used these silicone cupcake liners, filling them 1/3 of the way up, but you can also use this soap bar mold.
- Once the mixture is in the molds you will notice it immediately starts to firm up. Allow the bars to cool for at least 1-2 hours to ensure they are completely set.
- When set, they are ready to use. See notes for how to store the extra homemade shampoo bars.
Notes
This recipe makes 6 shampoo bars for me, I typically take 1 bar to my shower and leave the rest in plastic bags in the freezer. When I need another one I will simply take it out of the freezer and begin using it immediately.
You could easily double this recipe to make a large batch that will last a while.
If using a different mold than what I used, you will get a different number of shampoo bars in the end, whether that is more or less.

Homemade Shampoo Bar Recipe with Beeswax
Equipment
- Pot
- Glass Bowl
- Wooden Spoon or Rubber Spatula
- Silicone Molds
Materials
- 1 Cup Beeswax
- ¼ Cup Shea Butter
- 1 Tsp Vitamin E Oil
- ⅓ Cup Unscented Liquid Castile Soap
- 15 Drops Lavender Essential Oil
Instructions
- Start by creating a double boiler, this is a pot of water boiling on the stove (not too much water, I use about 2 cups), with a glass bowl set on top of the pot.
- Add your beeswax and shea butter to the glass bowl, using a wooden spoon or rubber spatula, mix every few minutes to ensure these ingredients are melting.
- Once the beeswax and shea butter are completely melted, turn off the heat.
- Add the vitamin E oil, unscented liquid Castile soap, and essential oils while the glass bowl is still on top of the pot with the stove turned off. The Castile soap will instantly turn into a solid, just stir it vigorously until it melts and mixes in with the other ingredients.
- Working quickly, take a small measuring cup and pour the mixture into your molds. I used these silicone cupcake liners, filling them 1/3 of the way up, but you can also use this soap bar mold.
- Once the mixture is in the molds you will notice it immediately starts to firm up. Allow the bars to cool for at least 1-2 hours to ensure they are completely set.
- When set, they are ready to use. See notes for how to store the extra homemade shampoo bars.
Notes
Coconut Milk Conditioner

Equipment
- Mixing Bowl
- Whisk
- Measuring Cups/Spoons
Materials
- 1 Can Full Fat Coconut Milk
- ¼ Cup Liquid Unscented Castile Soap
- 1 Teaspoon Sweet Almond Oil
- 20 Drops Essential Oils
Instructions
- If your can of coconut milk is in the fridge, take it out and allow it to come to room temperature. Once at room temperature, shake your can of coconut milk really well to ensure it is somewhat mixed.
- Add the entire can of coconut milk to a mixing bowl along with the rest of the ingredients.
- Once all ingredients have been added to the bowl, whisk vigorously until everything is mixed together and there are no clumps of coconut milk.
- Pour this into a container and set it in your shower. This will last 1-2 months in the shower, just make sure to check periodically to make sure there is no mold since coconut milk is technically a food product.
Notes
- It is important to use full-fat coconut milk in order to get a thick conditioner. If you were to use regular coconut milk that comes in a half-gallon contained at the store the mixture will be pure liquid and nearly impossible to use.
- I prefer sweet almond oil due to its benefits for hair however there are many other oils that can be used in place of this. A few great oils for hair are argan oil and jojoba oil.
Coconut Milk Conditioner Recipe
Equipment
- Mixing Bowl
- Whisk
- Measuring Cups/Spoons
Materials
- 1 Can Full Fat Coconut Milk
- ¼ Cup Liquid Unscented Castile Soap
- 1 Teaspoon Sweet Almond Oil
- 20 Drops Essential Oils
Instructions
- If your can of coconut milk is in the fridge, take it out and allow it to come to room temperature. Once at room temperature, shake your can of coconut milk really well to ensure it is somewhat mixed.
- Add the entire can of coconut milk to a mixing bowl along with the rest of the ingredients.
- Once all ingredients have been added to the bowl, whisk vigorously until everything is mixed together and there are no clumps of coconut milk.
- Pour this into a container and set it in your shower. This will last 1-2 months in the shower, just make sure to check periodically to make sure there is no mold since coconut milk is technically a food product.
Notes
- It is important to use full-fat coconut milk in order to get a thick conditioner. If you were to use regular coconut milk that comes in a half-gallon contained at the store the mixture will be pure liquid and nearly impossible to use.
- I prefer sweet almond oil due to its benefits for hair however there are many other oils that can be used in place of this. A few great oils for hair are argan oil and jojoba oil.
Self-Care: Skincare
Face Toner for Glowing Skin

Equipment
- Mixing Bowl
- Spoon
- Small Spray Bottle
Materials
- 1 Cup Green Tea (See Notes)
- 1 Tablespoon Pure Aloe Vera (See Notes)
- 3 Drops Vitamin E Oil
- 2 Drops Soft Skin Essential Oil (See Notes)
Instructions
- Start by brewing a bag of green tea, I used matcha green tea because that is what I had on hand but any green tea will work. Once your cup of tea is done, allow it to cool completely before starting the rest of the process.
- When the cup of tea is cooled, add all of the remaining ingredients into a jar or bowl and mix.
- With everything mixed, add it into a spray bottle (I like these ones).
Notes
- If you have the powdered bright green matcha tea, not in bags, it might change the outcome of this recipe. The matcha green tea I used to make this was in individual bags so I did not have to deal with the powder itself. You can try brewing the matcha as normal and using it or putting the matcha in tea bags to brew.
- It is important to use pure aloe vera, many aloe vera gels you typically see in the store are bright green and filled with artificial colors and chemicals. The gel I always use can be bought here, or you can make your own by cutting open the leaf of an aloe vera plant, scraping out the clear gel, and blending it, or using a fork to mix it so it is easier to manage. Aloe vera juice would also work for this recipe.
- There are many different essential oils you can use in this recipe, just be sure to keep it to 2 drops total no matter which ones you choose to use. Having essential oils diluted properly is important, especially when being used on the skin.
Green Tea Face Toner for Glowing Skin
Equipment
- Mixing Bowl
- Spoon
- Small Spray Bottle
Materials
- 1 Cup Green Tea (See Notes)
- 1 Tablespoon Pure Aloe Vera (See Notes)
- 3 Drops Vitamin E Oil
- 2 Drops Soft Skin Essential Oil (See Notes)
Instructions
- Start by brewing a bag of green tea, I used matcha green tea because that is what I had on hand but any green tea will work. Once your cup of tea is done, allow it to cool completely before starting the rest of the process.
- When the cup of tea is cooled, add all of the remaining ingredients into a jar or bowl and mix.
- With everything mixed, add it into a spray bottle (I like these ones).
Notes
- If you have the powdered bright green matcha tea, not in bags, it might change the outcome of this recipe. The matcha green tea I used to make this was in individual bags so I did not have to deal with the powder itself. You can try brewing the matcha as normal and using it or putting the matcha in tea bags to brew.
- It is important to use pure aloe vera, many aloe vera gels you typically see in the store are bright green and filled with artificial colors and chemicals. The gel I always use can be bought here, or you can make your own by cutting open the leaf of an aloe vera plant, scraping out the clear gel, and blending it, or using a fork to mix it so it is easier to manage. Aloe vera juice would also work for this recipe.
- There are many different essential oils you can use in this recipe, just be sure to keep it to 2 drops total no matter which ones you choose to use. Having essential oils diluted properly is important, especially when being used on the skin.
Anti-Aging Eye Cream

Equipment
- Glass Bowl heat safe
- Large Pot
- Small Jar
- Whisk
Ingredients
- 1 Cup Shea Butter
- 1 Tablespoon Sweet Almond Oil
- 5 Drops Vitamin E Oil
- 1 Packet Green Tea See Notes
- 1 Drop Essential Oil of Choice Optional
Instructions
- Create a double boiler, this is just a pot of water filled 1/4 of the way full. Let the water come to a boil and set a glass, heat-safe, bowl on top of the pot.
- Add shea butter into the glass bowl, whisking to ensure it melts.
- Once the shea butter is melted, turn off the heat and add the remaining ingredients. Whisk until fully combined. You want to work quickly on this part so the shea butter does not solidify before transferring the mixture into your eye cream container.
- When everything is well mixed, transfer the eye cream into whatever air-tight container you have chosen to use. Let it cool for 2-3 hours until fully set.
- You can use this as a part of your nightly skincare routine!
Notes
I used matcha green tea in my eye cream because that is usually what I have in my cupboards however what type of green tea you use does not matter, as long as it is green tea without any other teas mixed in. I tested this recipe using brewed green tea and the final product was never set so it is important to use the dried tea inside the packet directly into the eye cream.
If the green tea is a loose leaf, meaning it hasn’t been ground into a powder, it is best that you grind the tea in a small blender or mortar and pestle, otherwise you will be spreading large chunks of tea onto your face which is no fun!
You will see small flecks of tea in the finished product, even if using a ground green tea powder.

The Best Homemade Anti-Aging Eye Cream
Equipment
- Glass Bowl heat safe
- Large Pot
- Small Jar
- Whisk
Materials
- 1 Cup Shea Butter
- 5 Drops Vitamin E Oil
- 1 Packet Green Tea See Notes
- 1 Drop Essential Oil of Choice Optional
Instructions
- Create a double boiler, this is just a pot of water filled 1/4 of the way full. Let the water come to a boil and set a glass, heat-safe, bowl on top of the pot.
- Add shea butter into the glass bowl, whisking to ensure it melts.
- Once the shea butter is melted, turn off the heat and add the remaining ingredients. Whisk until fully combined. You want to work quickly on this part so the shea butter does not solidify before transferring the mixture into your eye cream container.
- When everything is well mixed, transfer the eye cream into whatever air-tight container you have chosen to use. Let it cool for 2-3 hours until fully set.
- You can use this as a part of your nightly skincare routine!
Notes
Charcoal Face Mask

Equipment
- 1 Glass Jar with Lid
- Mixing Spoon
- Measuring Spoons
Materials
- 2 Tablespoons Aloe Vera See Notes
- 1 Tablespoon Raw Honey See Notes
- ½ Teaspoon Vitamin E Oil
- ½ Teaspoon Activated Charcoal Powder
- 4 Drops Soft Skin Essential Oil
Instructions
- Mix all of the ingredients together until the mixture is smooth.
- Store in an airtight container in the fridge for up to 1 week.
Notes
- IMPORTANT! Rinse off the charcoal face mask with whatever facial soap you use. Charcoal is black and can stick if not rinsed off with soap
- If you have an aloe vera plant in your home, you could simply open up a leaf, scoop out the aloe vera gel and use that. If it is too sticky just blend the gel until it’s a smooth consistency.
- The honey does not have to be raw however, raw honey has much more micronutrients and antioxidants that are beneficial to the skin.
Charcoal Face Mask DIY
Equipment
- 1 Glass Jar with Lid
- Mixing Spoon
- Measuring Spoons
Materials
- 2 Tablespoons Aloe Vera See Notes
- 1 Tablespoon Raw Honey See Notes
- ½ Teaspoon Vitamin E Oil
- ½ Teaspoon Activated Charcoal Powder
- 4 Drops Soft Skin Essential Oil
Instructions
- Mix all of the ingredients together until the mixture is smooth.
- Store in an airtight container in the fridge for up to 1 week.
Notes
- IMPORTANT! Rinse off the charcoal face mask with whatever facial soap you use. Charcoal is black and can stick if not rinsed off with soap
- If you have an aloe vera plant in your home, you could simply open up a leaf, scoop out the aloe vera gel and use that. If it is too sticky just blend the gel until it’s a smooth consistency.
- The honey does not have to be raw however, raw honey has much more micronutrients and antioxidants that are beneficial to the skin.
Want More Self-Care Ideas? Check This Out!
How to Make Antibacterial Hand Soap with Essential Oils
This post may contain affiliate links, I may receive commissions for purchases made through these links at no additional cost to you.


